Premier One Pools – New Plaster Start-Up Guide
Why the First 28 Days Matter
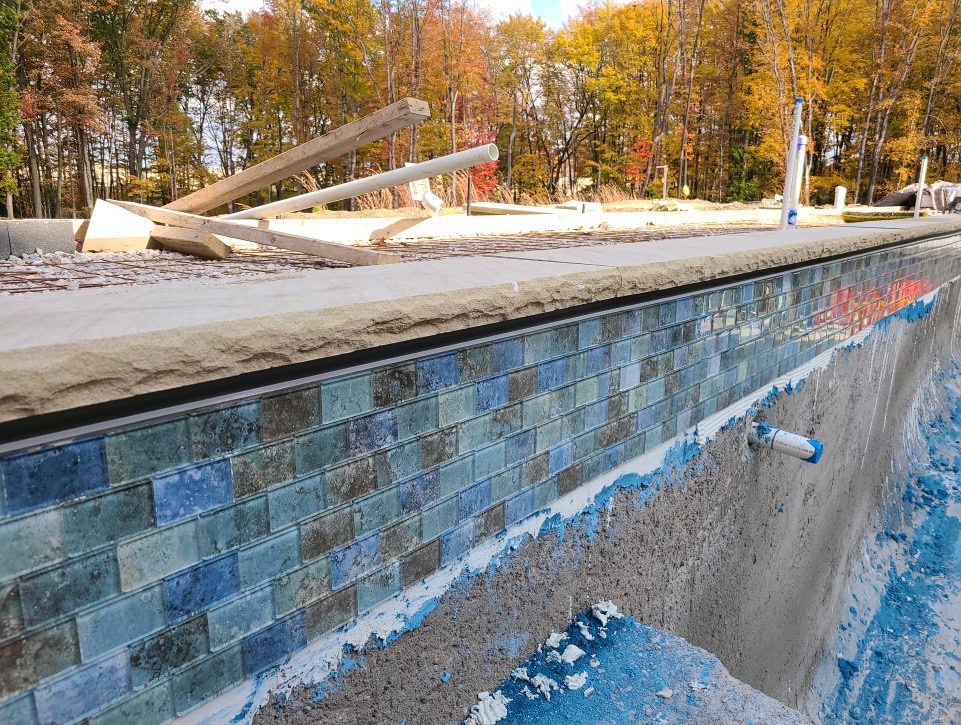
At Premier One Pools, we believe your backyard should be an oasis. After your pool’s interior is newly plastered, the next 28 days are critical to achieving a smooth, long-lasting finish. During this time, the plaster surface is still curing and is particularly sensitive to imbalanced water, which can cause staining, scaling, or surface issues. Following this guide will help ensure the best possible results for your luxury pool experience.
Filling Your Pool – Getting It Right from the Start
- Make sure your pool’s circulation and filtration systems are ready and running properly.
- Place a clean cloth over the end of the hose and position it at the deepest point of the pool to avoid damaging the surface. If a water truck is used, begin with a 24-inch cushion of hose water before introducing truck-delivered water.
- Fill the pool in one uninterrupted session with clean potable water until it reaches halfway up the skimmer or designated water line.
- Avoid introducing any other water sources, including rain or sprinklers, to prevent discoloration or streaking.
- Keep all swimmers (and pets!) out of the water until chemical levels are stable and safe.
- Test your source water for pH, total alkalinity (TA), calcium hardness (CH), and metals. Keep a record of results.
- Start your pump and filtration system immediately after the pool is filled. Do not activate the heater until the water is clear and chemically balanced.
Step-by-Step Start-Up Schedule
Day 1
- Test and document your pH, TA, and CH levels.
- If TA is high, lower it to 80–100 ppm using diluted muriatic acid. Always add acid to water—never the other way around.
- If TA is too low, raise it with baking soda until it reaches at least 80 ppm.
- Adjust pH to 7.2–7.6, only after the TA is within the correct range.
- Increase CH to at least 80–100 ppm using pre-dissolved calcium chloride in 10 lb increments (space doses out by a few hours).
- Never add baking soda and calcium chloride at the same time.
- Brush the entire surface of the pool at least twice daily to remove plaster dust.
- Optionally add a sequestrant (metal and scale control) as directed on the product label.
- Keep the filtration system running 24/7 for at least the first 3 days or until water is crystal clear.
- Hold off on adding chlorine for 48 hours. Do not use your heater until the pool is dust-free.
Day 2
- Repeat testing for pH, TA, and CH.
- Adjust TA and pH if needed, and increase CH to 100–150 ppm in stages as before.
Day 3
- Continue adjusting pH, TA, and CH as necessary.
- Begin chlorination to reach 1.5–3.0 ppm.
- Brush the pool surfaces twice daily.
- If your pool has a saltwater system, do not add salt for the first 30 days.
Days 4-7
- Test and maintain proper pH (7.2–7.6) and TA (80–120 ppm).
- Continue daily brushing and keep the filtration system running.
- Install return fittings and any in-floor cleaning heads once water chemistry is stable.
Day 4 Specific
- If needed, slowly raise calcium hardness to a minimum of 200 ppm.
- Start adjusting cyanuric acid (CYA) to 30–50 ppm. Add through the skimmer with the pump running, and brush thoroughly after each dose.
Day 7
- Use a brush vacuum to remove any remaining dust.
Days 7-28
- Once plaster dust is gone and cleaning systems are active, reduce brushing to as-needed maintenance for leaves or when adding chemicals.
Long-Term Water Maintenance
Your pool’s beauty doesn’t end after curing. Ongoing maintenance ensures your Premier One Pools finish looks pristine for years to come.
Recommended Water Chemistry Levels
- Free Chlorine: 1–3 ppm
- pH: 7.2–7.6
- Carbonate Alkalinity: 80–120 ppm
- Calcium Hardness: 200–400 ppm
- Cyanuric Acid (CYA): 30–50 ppm
- TDS (non-saltwater pools): 300–1800 ppm
- Salt: Follow salt system manufacturer’s specs
- Sequestering Agent: Use as recommended by the product
Managing CYA Levels
Avoid CYA levels above 100 ppm, which can damage the pool finish. If your test result is close to this threshold, dilute the water sample by 50% and retest. If it’s still high, consider partial draining and dilution to restore balance.
Homeowner's Guide Sample Download
You Can Influence the Final Cost
We’ll help you explore smart ways to keep your project on budget while still getting a beautiful, durable pool:
- Choose efficient shapes and sizes
- Phase features over time
- Select cost-effective materials for coping and decking
- Finance your project over 5, 10, or 20 years
- Use 3D designs to preview before you commit